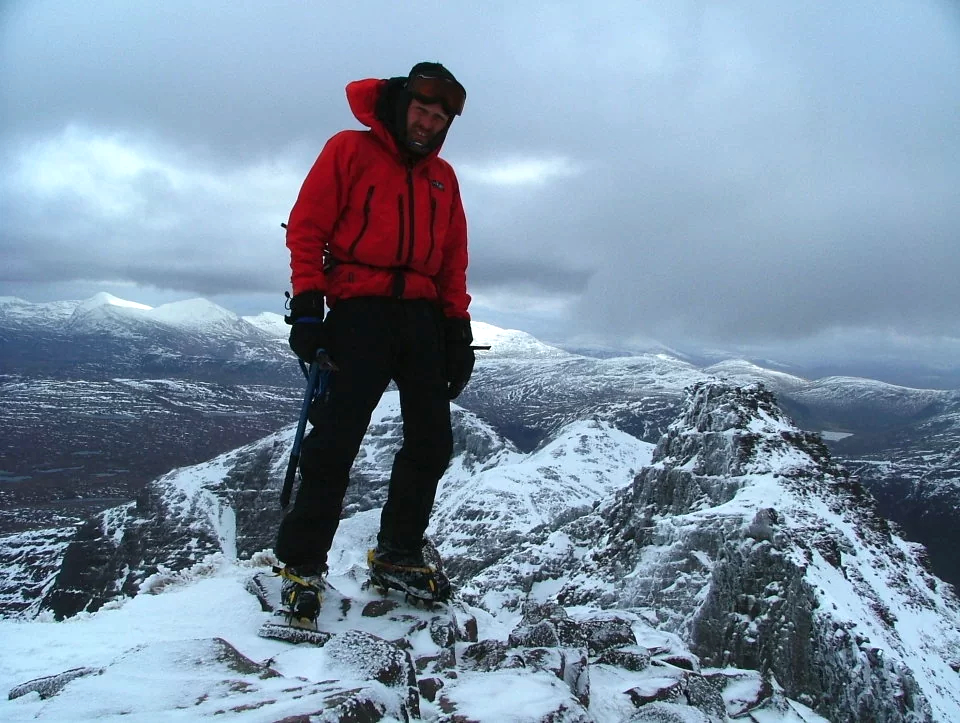
Remembering Steve Perry 1971-2019
As a tribute to Steve Perry, who died in the snow on Ben Hope a year ago, 5th February 2019, with his good friend Andy Nisbet, we’ve reproduced the start of the interview about his Winter Munros journey he did with Dan Bailey for UKHillwalking.com…..... For the full article click here
Steve's 121-day Winter284 challenge covered around 1500 miles and 450,000 feet of ascent over all 284 Munros (there are now officially 283). This was undertaken a few years after another epic journey, a 7.5-month walk from Lands End to John o' Groats (LEJOG) via every 3000-footer in England, Wales and Scotland. He's clearly a glutton for punishment.
Over the 2005-2006 season Yorkshireman Steve Perry completed the first, and to date the only, continuous winter Munro round on foot - one of the hardest mountain journeys ever undertaken in Britain. We asked him to relive the experience.
 |
 |
Was LEJOG too easy or something – what made you think to do Winter284 in the first place?
Looking back at both challenges now, I feel the Winter284 round topped the LEJOG in difficulty and hardship but I suppose that was the aim.
I didn't invent the idea of a continuous winter round; Martin Moran had already completed a very fast vehicle-supported winter round in the 80's and Mike Cawthorne had hiked a continuous winter round of all 135 thousand metre peaks in the 90's. In the end a continuous walking round of the whole lot was just hanging there waiting to be picked and after my LEJOG hike it felt like the right thing to do, a natural progression perhaps.
How did you train and generally prepare for it?
Physically I did nothing extra outside my normal routine of weekends spent out in the hills. I did however prepare myself mentally by regularly running the route through my mind to envisage how different and more diffcult it would be opposed to my LEJOG round. On top of that I basically spent a lot of time convincing myself I could and would do it, and by no means ever give in.
How did you plan the route in advance, and did the plan change at all as you went along?
This was simple and took no time at all, I just altered the starting point used on the LEJOG round from Ben Lomond to Ben More on Mull. This meant a slightly different route through the early southern Munros and was cetainly more efficient. Once underway I changed my route twice; one was only slight yet enabled me to quickly climb 5 Munros around Glen Dochart without a pack, and then spend a night at Crianlarich SYHA in bad weather. A second more sizable alteration swapped the order I passed through Glen Etive, Glen Coe and Ballachullish. Both changes were on the advice of Lorraine McCall who had just completed a continuous summer round herself (see this UKH article), and both worked perfectly.
What influenced your choice of gear?
Basically I needed gear that kept me warm and dry. I searched for a layering system that covered a range of temperatures so there wouldn't be a constant stop/start of stripping off and putting on layers. The system also had to be simple; I didn't want lots of different layers and styles, less is more and all that. I also decided that being comfortable at night, and trusting the tent would guarantee sleep and essential rest. For all this I was prepared to carry extra weight. I've never been an ultra light guru thats feels a sleeping bag is too heavy if they're not shivering in it - I'd prefer a few extra pounds and comfort, any day.
My main influences were people I knew to be very active in the outdoors and actually use the gear they recommended; Lorraine McCall, Chris Townsend and Neil Mcadie to name but a few. Their advice mixed with my own experiences suggested the kit list.
Kit list
- Smartwool mid weight long sleeved top x2
- Rab Vapour-rise jacket
- Rab Latok jacket
- Rab Neutrino down jacket
- Rab Vapour-rise pants
- Rab Latok pants
- Smartwool socks x 2 pairs
- Smartwool long johns (for sleeping in)
- Berghaus Yeti Gaiters
- Berghaus Kibo GTX boots
- Grivel Air Tech crampons
- Mountain Technology ice axe
- Pacerpoles with snow baskets
- Extremeties Ice Gauntlet gloves
- Extremeties Tuff Bag mitts
- Extremeties Hot Took hat
- Extremeties Thinny gloves
- Berghaus C70 Pro Bio-Flex Rucksack and pack liner
- Therm-a-Rest Pro Lite 3 (Full Length)
- Terra Nova Discovery bivi bag
- Terra Nova Laserlight tent
- Rab Quantum 800 Neutrino sleeping bag
- Primus Gravity stove
- MSR Titanium Cook Pot with handle
- Titanium fork
- Swiss Army knife
- Compass (glow in the dark)
- Ortleib map case
- GPS
- Disposable lighter x2
- Silva L1 Head Torch
- Snow goggles
- Sun glasses
- Suunto Vector watch
- Camera
- Runner's bum bag
- Titanium cup
- Toilet roll
- High tech river crossing kit (bin liners + elastic bands)
What about logistics?
I spent a day at home making up parcels for each section of the route. Myself and Lorraine McCall then drove hundreds of miles around the Highlands leaving them at SYHAs, pubs, hotels and with friends. A typical box would contain Wayfayrer Meals, pasta, dried milk, sugar, cereal, chocolate (lots), Nutri-grain bars, biscuits, batteries and maps.
You didn't carry a full pack over every hill: how far did you factor this ability to go lightweight into your route planning?
There are lots of mountain groups where it was possible to store my gear then pick off the surrounding Munros fast without the pack. The base could be a bothy, a hostel, my tent or basically my pack just left at some point central to the group. It was crucial never to lose the pack so I always took a GPS reading of its position before leaving. My lightweight approach comprised a bum-bag with crampons and ice axe tied on to it, a map and compass, headtorch, snacks for the hill and a cup to drink from. I never once carried water, only a cup, and I never struggled to source it.
How often did you camp versus staying in hostels?
In total there were; 28 nights in my tent (4 of which were above 3000 ft), 25 nights in bothies and the rest a mixture of SYHAs, bunkhouses, pubs and friends' houses.
Did your schedule ever feel tight? What about unplanned delays?
For the challenge to be a success I had to complete it inside the winter season, between December 1st and March 31st. Towards the end it became very close indeed with me reaching the summit of Ben Hope around dinnertime on March 31st. There were also plenty of unplanned delays in which I lost valuable time. In total I spent seven frustrating days off the summits due to bad weather and three days of scheduled rest.
Until Glen Shiel I was always just ahead of schedule but after losing two consecutive days there I was chasing my tail all the way to Ben Hope. But I never seriously doubted I'd do it.
What were ground conditions like that season? Ever wish you'd brought skis or snowshoes?
The first few weeks until Christmas were almost totally dry and frozen conditons, with temperatures dropping below -10C regularly yet no heavy snow worth mentioning. Underfoot the ice was treacherous and I had the bruises to prove it. The first real snow came between Christmas and New Year along with very high winds that kept me off the hill in Glen Coe.
January was a mixed bag; snow flurries, high winds, whiteouts, sleet and then fantastic high pressure through the Cairngorms bringing sub -15C temperatures with magnificent inversions.
For the full article click here...
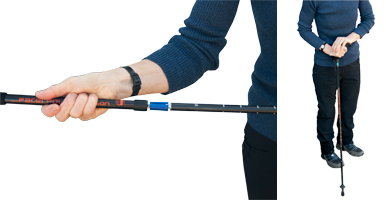
 To adjust the height, hold two adjacent shaft sections one in each hand.